Description
"WHISTLER" - A little 15' 9" runabout, light enough to go on a trailer with ease. Beam is 5' 6", draft is 15'/2" under the propeller tip. Simple-to-build strip construction makes her fast and inexpensive. Speeds to 22 knots with the Brennan Imp or equivalent for power. Includes lines, offsets, construction drawings, article reprint, etc. 4 sheets.
THIS EXQUISITELY SHAPED little motorboat will fill the bill for the backyard builder who wants inboard economy and convenience. Whistlerwill give you extreme trailability;
and she is of strip construction so that those who can work only limited hours on her can build her a few strips an evening.
Whistler is 15 feet 9 inches overall by 5 feet 6 inches beam. Her draft is 15-1/2 inches under the propeller tip. She will weigh 850 pounds, the exact figure varying with your construction interpretation.
Launched and ready to test, with one passenger and the usual boatload of oil cans, gimmicks and equipment, chances are that she'll weigh 1,256 pounds. Thus she is light
and portable. Any 1,000-pound trailer will handle her.
There are many men who have fed 2-cycle motors who object to mixing expensive oil with gas and burning it as fuel to get lubrication. Using a motor made for just such applications, namely the Brennan Imp, a two weeks' vacation fuel bill of $35 can be cut to $10. Whistler's speed, turning with this motor a 9 inch diameter by 7 inch pitch 3-blade thin section wheel (Federal) will be above 20 miles an hour, and can go to 22 if you finish her smoothly and let the paint dry hard.
The inboard application provides planetary reverse, self-starter and , generator to give ample electricity for lights.
The foregoing is no swipe at the outboard motor. It's just that it takes all hinds of tastes to make a boating world. The 186-pound 4-cycle Brennan with her little cylinder block no larger than a storage battery has, as far as I know, had few designs done as this one is

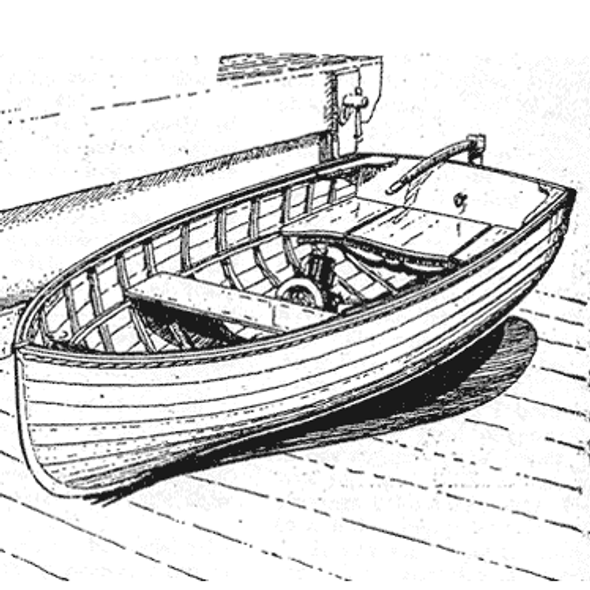
Here are Whistler's clean lines. The strip constructon design makes her both very easy to build and inexpensive. Sawing your own strips from larger pieces of wood will give a lumber bill on her of about $125. With a power plant of about $600. she can be yours for little more than $750. Her new retail price would be around $2,000. (Editor's note: Prices quoted in this article are very old)
Whistler's lumber bill will not be much over $125 because no boat builds for as little lumber as a strip boat. You resaw your own stuff to get the strips, each board 5/4 inches by 6 inches producing six strips. Hardly any waste. With the motor and shaft, piping, and such, costing between $500 and $600, I am sure $750 would see her built. Anything like it in the retail market goes at around $1,800 to $2,000.
By motorizing a strip boat, one increases its value fivefold. A builder could get only $300 to $400 for the strip hull.
The building of Whistler is simplicity itself, usually grasped at once by one who has never built a boat before. In fact, there is so little to tell I have done it mostly with pictures. With the normal full boat plan, anybody can undertake her.
First, you lay the lines drawing down in your shop full size, using a 3/4" x 3/4" white pine batten 18' long for the sweep of the main lines. A 3/16" x 1/2" white pine batten will do, used edgeways, to fair in the body plan. Use two panels of cheap plywood, 4' x 8', end to end, for your lofting.
When all is sweet and fair, and my errors in scaling are justified, proceed to get out the molds. These may be either of scab lumber or of 3/8-inch household-grade plywood, braced thwartship as sketched. You diminish the molds by 'the thickness of the planking, or 1/2 inch.
The transom, expanded, to true size along the raking face (not the end projection on your body plan), is also part of the mold assembly. This whole lash-up is sketched in Figs. 1, 2 and 3 on the details page. Fig. I shows a scab-lumber mold, with a few strips, starting at the sheer, being nailed up toward the keel. Fig. 2 is a scheme, not a true perspective, showing the port) or left side, all planked, and the right, or starboard side, about half-stripped up. This may be slightly misleading: Build one or two strips a side, then match it on the opposite side. Hull stresses thus even themselves out.
This method of working from the sheer up has the advantage of producing a fair sheer to start with and of narrowing down to the closing or shutter plank - "stealer" it is sometimes called. It has one disadvantage: It is often hard to nail the strips as you turn the forefoot at the stem. By predrilling and presetting the nails, this is lessened.
By building right side up, putting the shutter in first, as professional builders do it, you'll likely end up with a sheer that would break a snake's back to follow. Let the pros do it that way. They have built enough hulls off their molds so that they have the shutter adjusted to produce the correct sheer. The one hull builder will do a better job as I illustrate it.
Next, you get out the keel. I'd rabbet only the stemhead for a few inches. It is easier to outline the rabbet line with a chisel first, then cut into the proper rabbet as you stream the planking. A friend can buck your cuts with a heavy hunk of hard firewood. Thus, the boarding line produces itself as you plank and you get a tighter hood end for your plank.
There are only a few gimmicks of instruction about stripping out a hull. Screw-fasten the first strip with extreme care to the mold at the exact sheer line. See that the next few strips do not disturb the sweep. Buck all your nails, of course, so you don't move the sheer strake. After a few strakes are glued and nailed into place, you can dispense with bucking.
The nailing pattern is quite clear from the sketch. Remember, your frames are on 5-inch centers, so select an initial nail spacing that will leave a clear girth for bending the frame and nailing it. Use 6d or 7d galvanized nails; predrill holes with an electric drill somewhat undersize. Use casein glue, not perhaps completely waterproof, but water resistant. Mix it and use it fresh, strictly to directions. Wipe off excess inboard glue immediately with a hot, wet towel.
An occasional screw will help hold one strip against another and prevent loosening during work.
In Fig. 4, the shutter is shown. The dimensions are probable, but may not fit your boat. Depends on your beveling, strip width, and so forth. When you get closed in so that the widest gap is about 5 inches, scribe the shutter against carbon paper, cut it, scab it outboard until the frames are in. If a good tight wood-to-wood joint is had, it will swell watertight and give no trouble. You might, if you desire, work an angle outgage, or groove here, and fill the seam with Sealer 900âa rubber cement.
The steaming outfit - the best friend any boatbuilder ever had - is a simple affair. It will take a bit of cobbling to get it, but what of it? You have to have tools to build any boat. As shown, a 10-foot length of copper tubing is whirled around inside a cheap airtight stove. The top half of the coil must be above water level. Then steam will flow to the box. About 20 minutes of steaming will make the frames pliable.
Use automobile body irons for clinching the clout nails. Predrill all the clout nail holes along lines found by bending a batten in way of the frame center.
Note that the engine bed is clipped to the bilge stringers, and that the stringers are screw fastened down to the frames.
About 160 man hours will be consumed in building Whistler, assuming a full eight hour day. With cold starts each evening it will take longer, but she'll build between now and spring with little extra effort. Two men in a commercial boat shop could plank, trim out, and install the motor in her in about two and a half weeks, assuming everything was at hand.
Use copper tube for the exhaust pipe - NOT water pipe and conventional elbows and nipples. Connect the tube with steam hose nipples. The rest of the job is old hat.
A good paint scheme is to take buff paint, and burnt sienna color to get a malted-milk topside color. A crimson boot top and a white bottom will make her a cynosure.
How'd I get the name Whistler? A duck or a goose, or something? Nope, Her model in my office evokes wolf whistles. Why not call her Whistler?
Weston Farmer


